Here is how I was able to connect to Oracle Database through ODBC with Oracle’s Instant Client on Windows.
As a prerequisite, download and install “Visual C++ Runtime for Visual Studio 2013”, if you have never done that on your windows.
https://www.microsoft.com/en-us/download/details.aspx?id=40784
Then, you need to download following 2 packages from following Oracle Technology Network page. (Registration is required.)
OTN page: http://www.oracle.com/technetwork/topics/winx64soft-089540.html
Packages to download:
- Instant Client Package (Basic)
- Instant Client Package (ODBC)
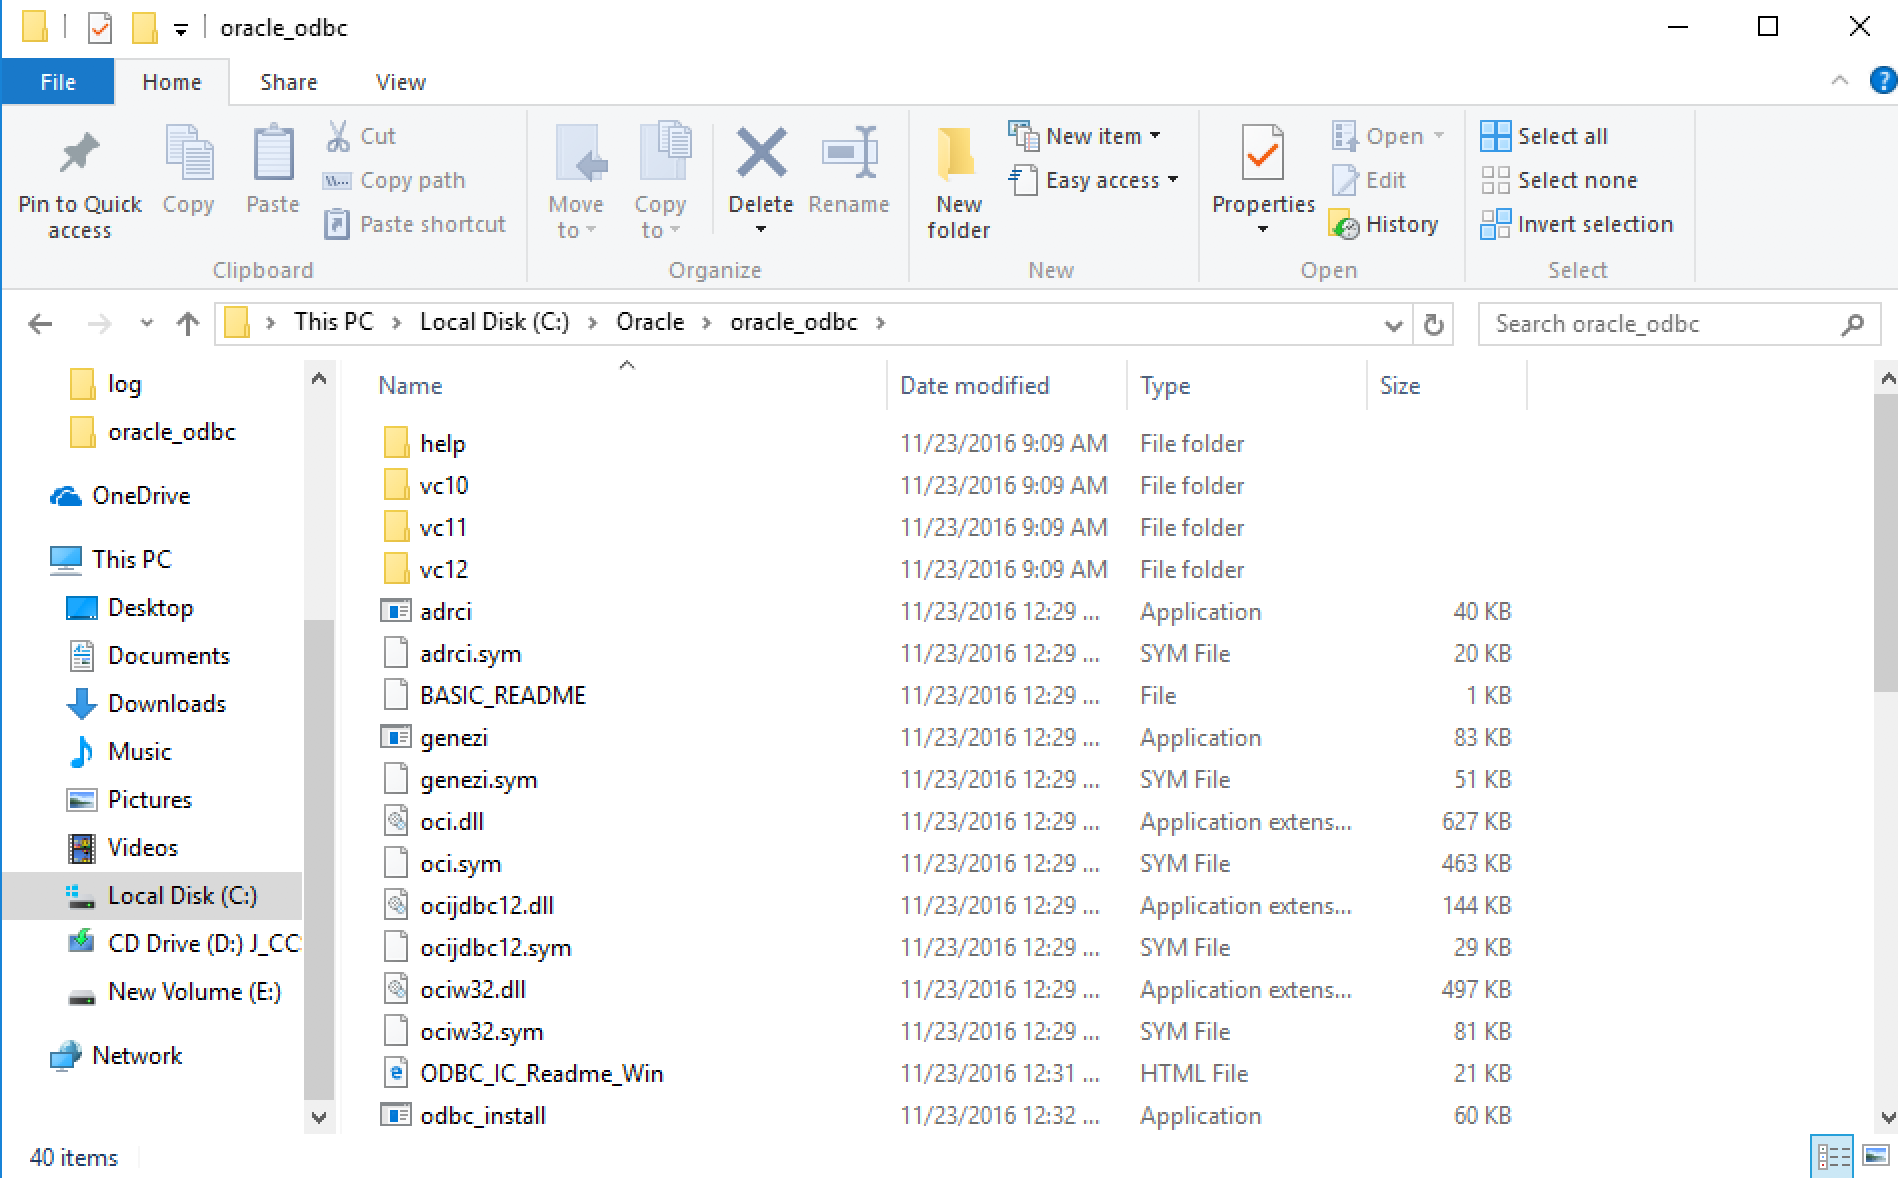
Then unzip those packages into one same folder.
I created a folder named C:/Oracle/oracle_odbc, which looks like following.
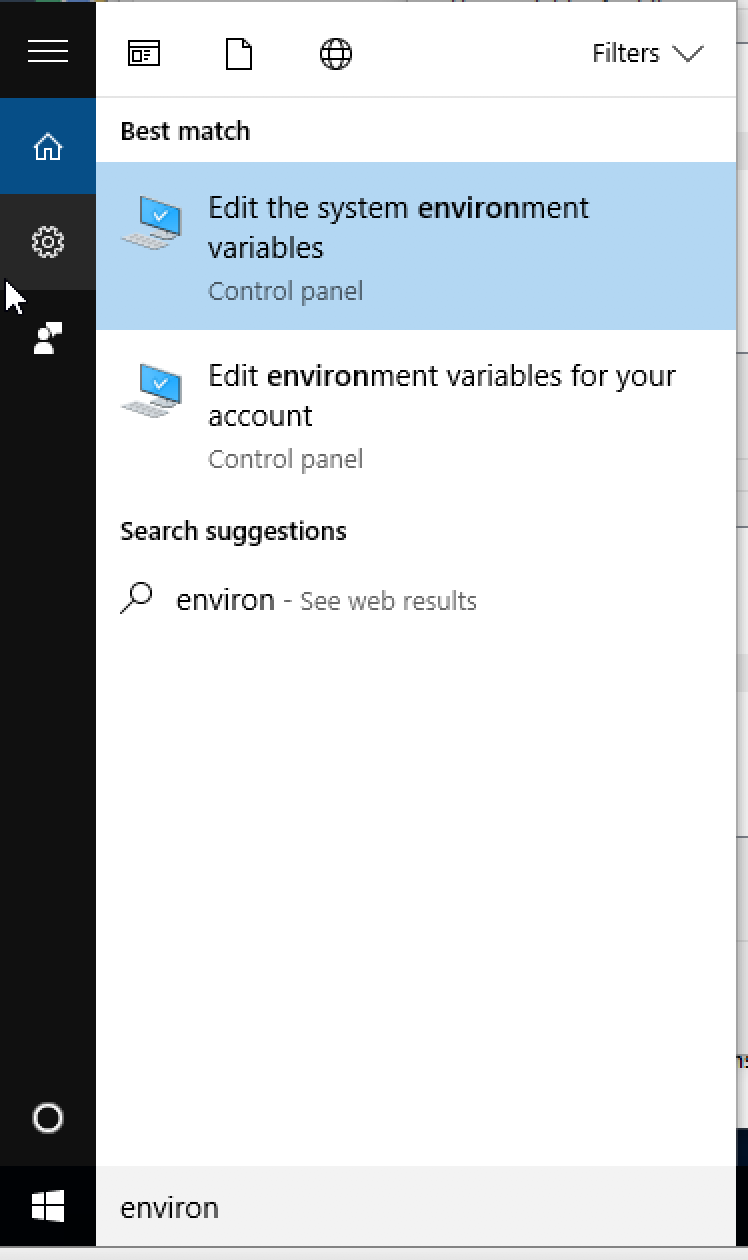
Then we need to set up 2 environment variables which points this directory.
To set environment variable, type “environment” into your Windows’s search box, and you should see something like this result.
Click “Edit the system environment variables” and this dialog will open up.
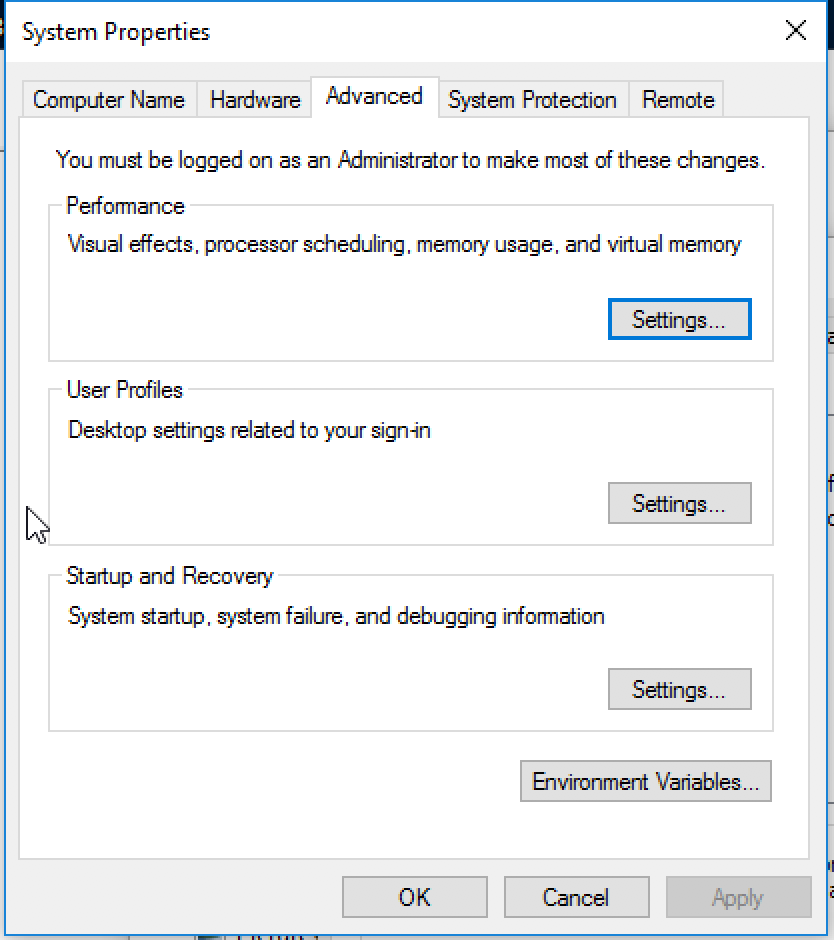
Click “Environment Variables…” button.
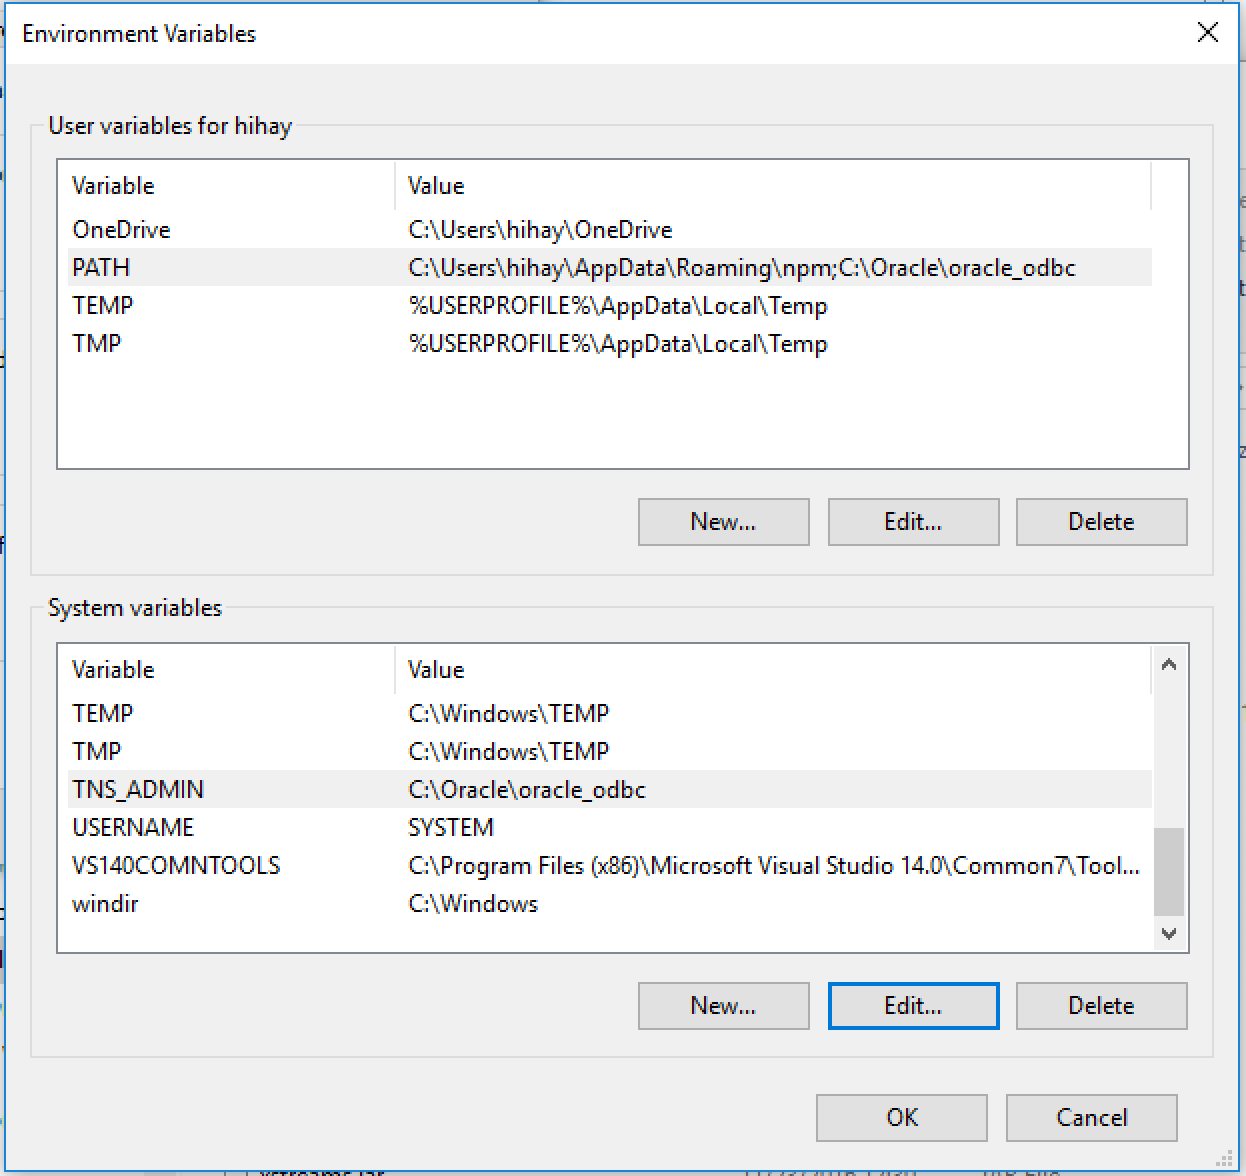
Let’s first set PATH environment variable. It is in the upper pane. By selecting PATH and clicking “Edit…” button,
you will see following form.
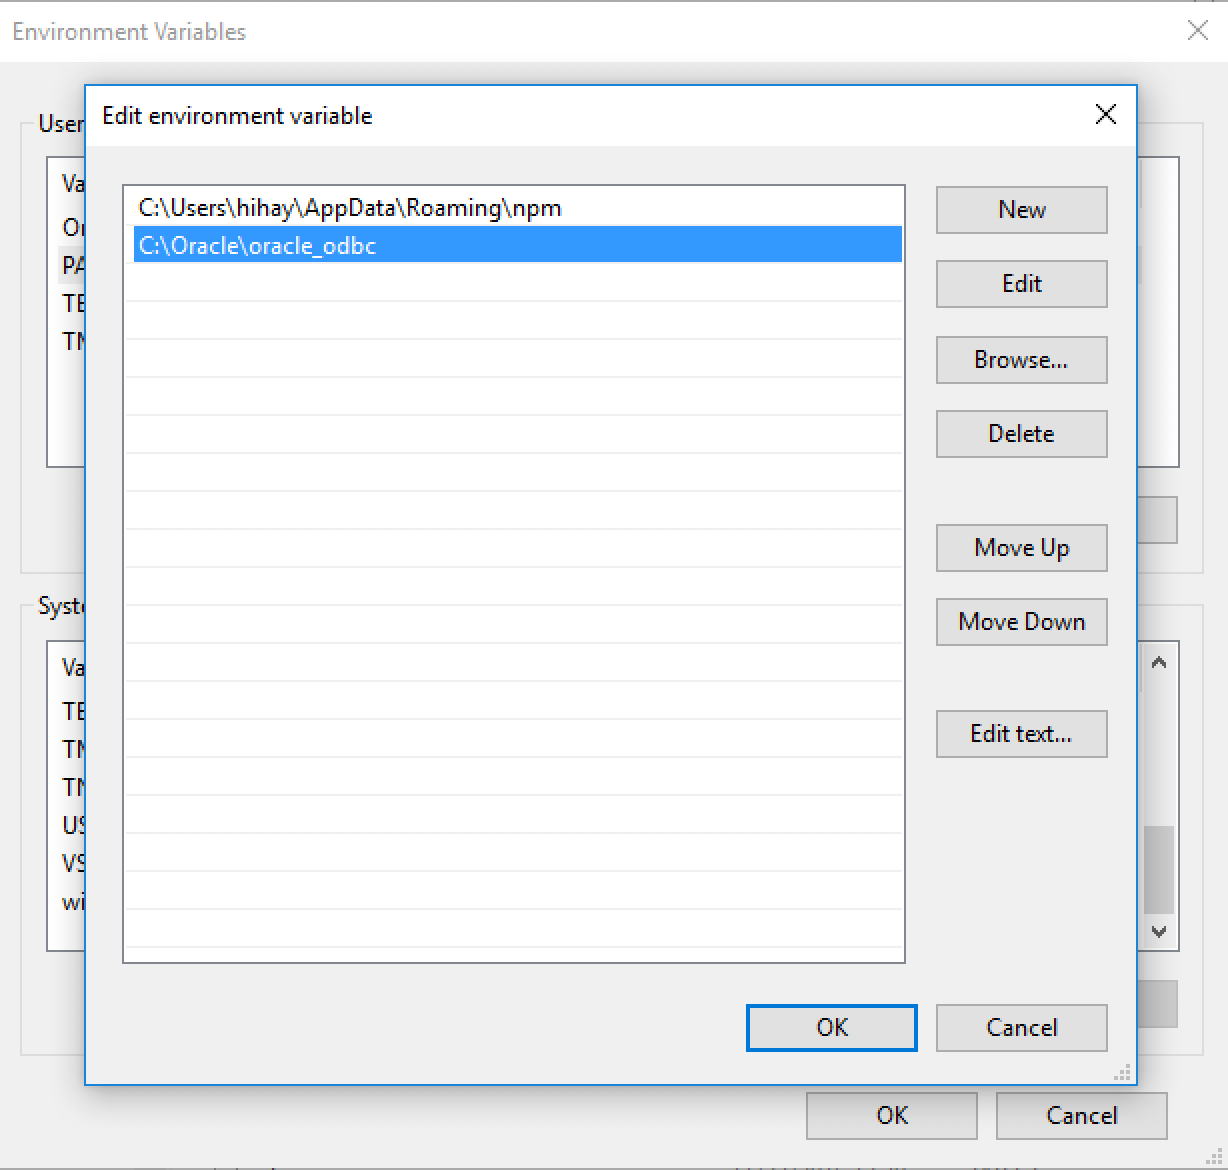
I added the path of the directory I created above here. Click OK.
Then, let’s set TNS_ADMIN environment variable. Click New button on the lower pain.

In the dialog that opened up, type in TNS_ADMIN as variable name, and the path of directory you created as variable value. Click OK.
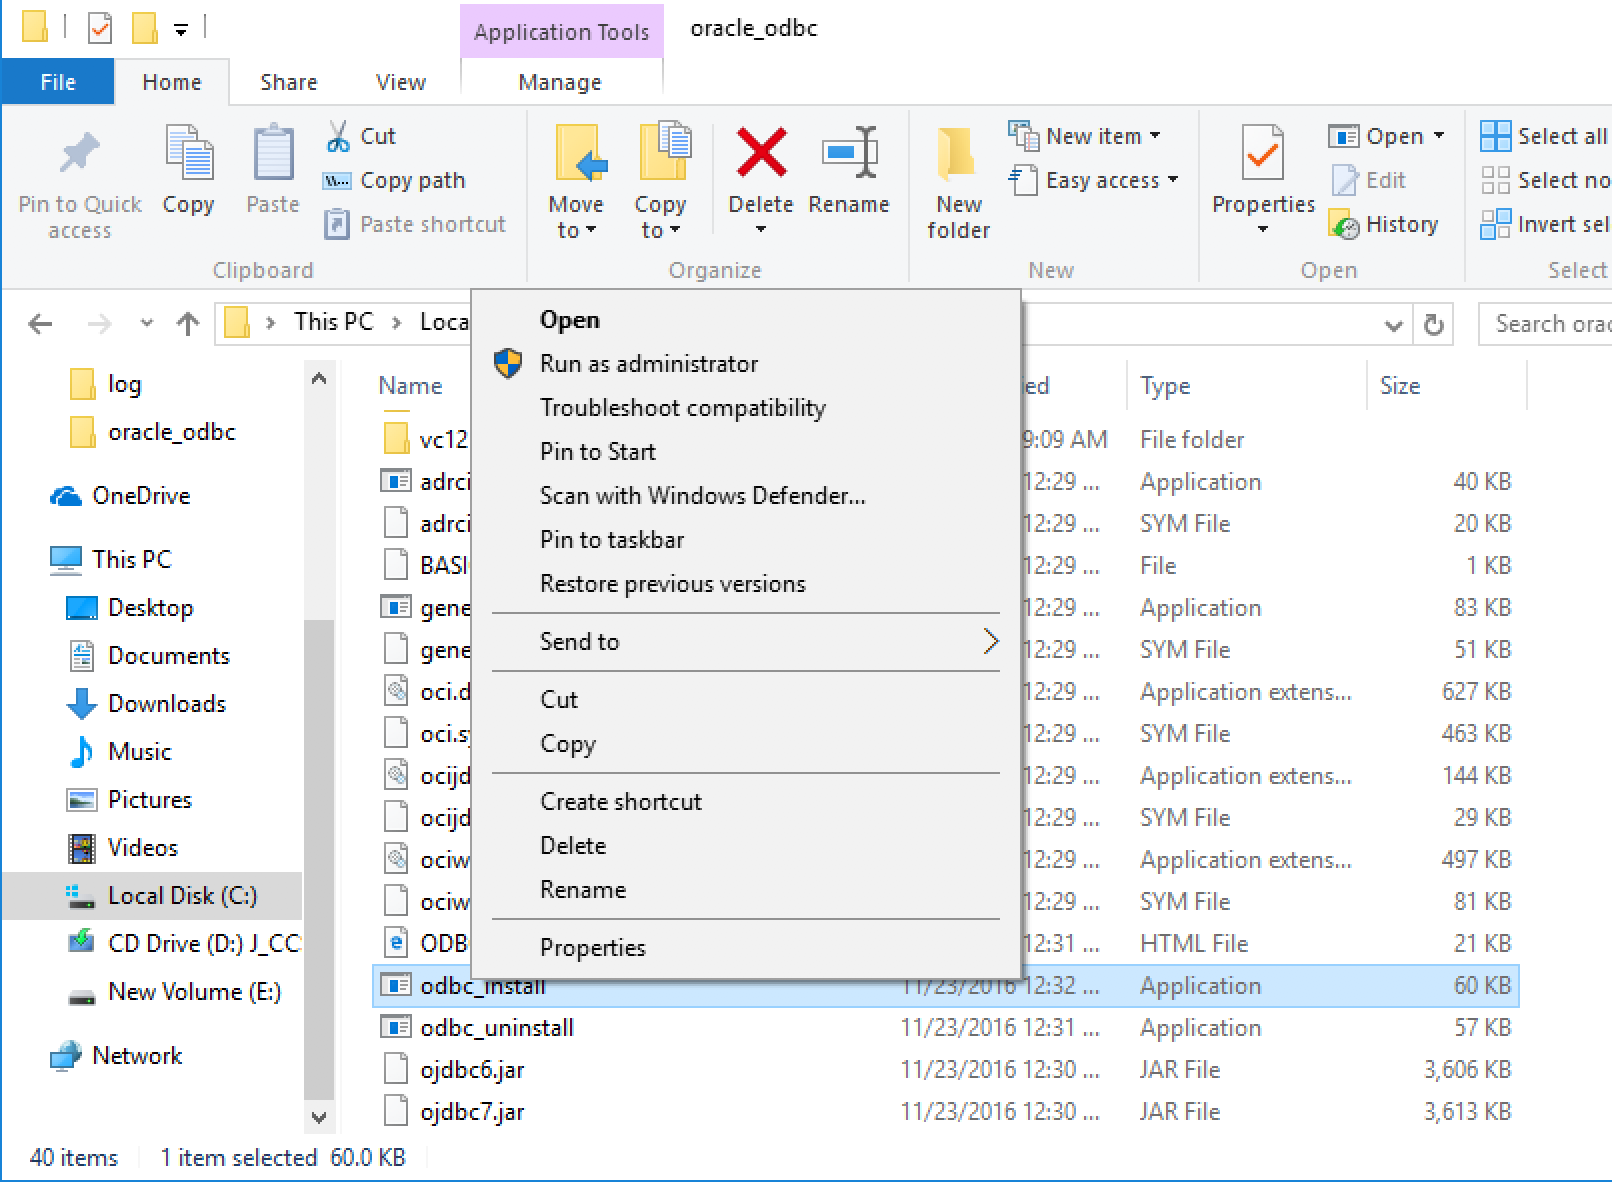
Then, go back to the directory we created, and run a exe file named “odbc_install” as administrator by right-clicking
it and selecting “Run as administrator” like following.
Then, create a text file named “tnsnames.ora” in the same directory, which looks like following.
TEST_ORACLE =
 (DESCRIPTION =
   (ADDRESS_LIST =
     (ADDRESS =
       (PROTOCOL = TCP)
       (HOST = exploratory.cnxxxxxx.us-east-1.rds.amazonaws.com)
       (PORT = 1521)
      )
    )
    (CONNECT_DATA =
     (SID = ORCL)
    )
  )
Replace HOST, PORT, SID (name of database) in the above, with the value for your database.
Now, type in “odbc” to Windows’s search box and find ODBC Data Sources (64-bit).
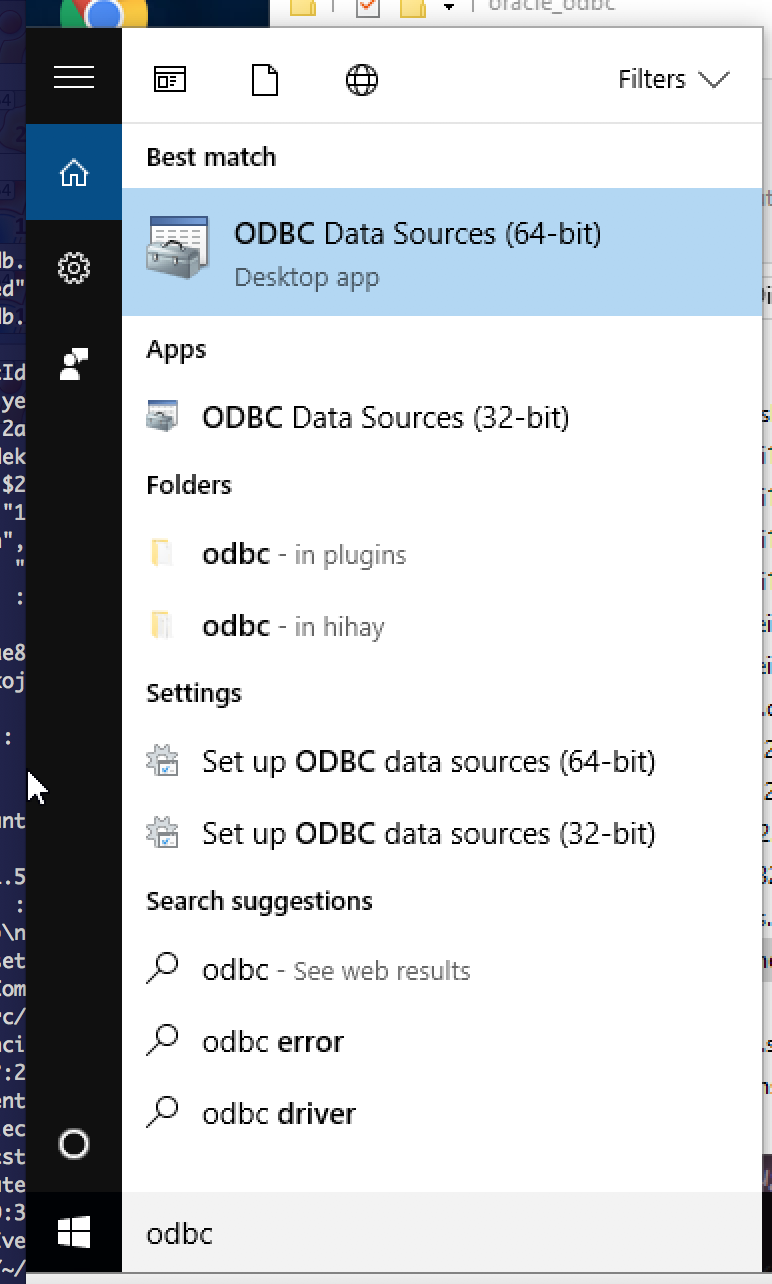
Click it to open the following dialog.
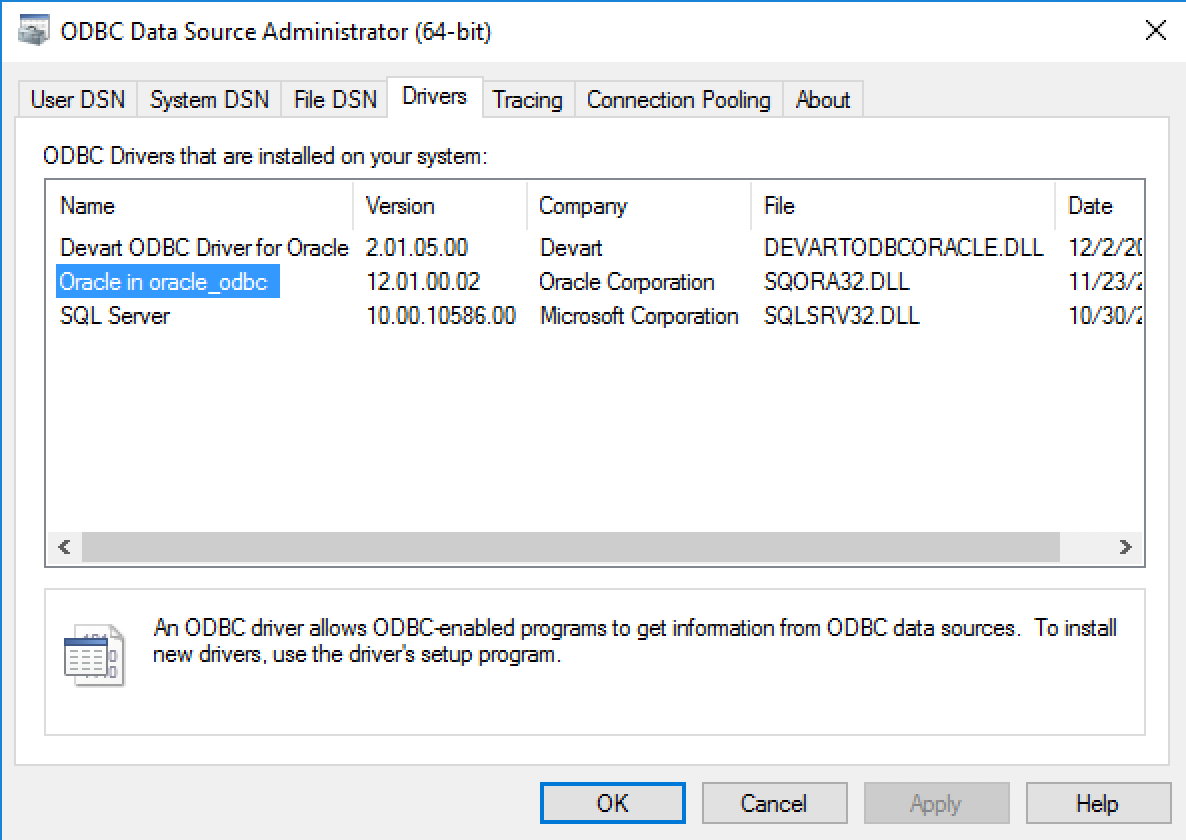
In the Drivers tab, you should see an entry with the driver you just installed.
Go to User DSN tab, and click Add.
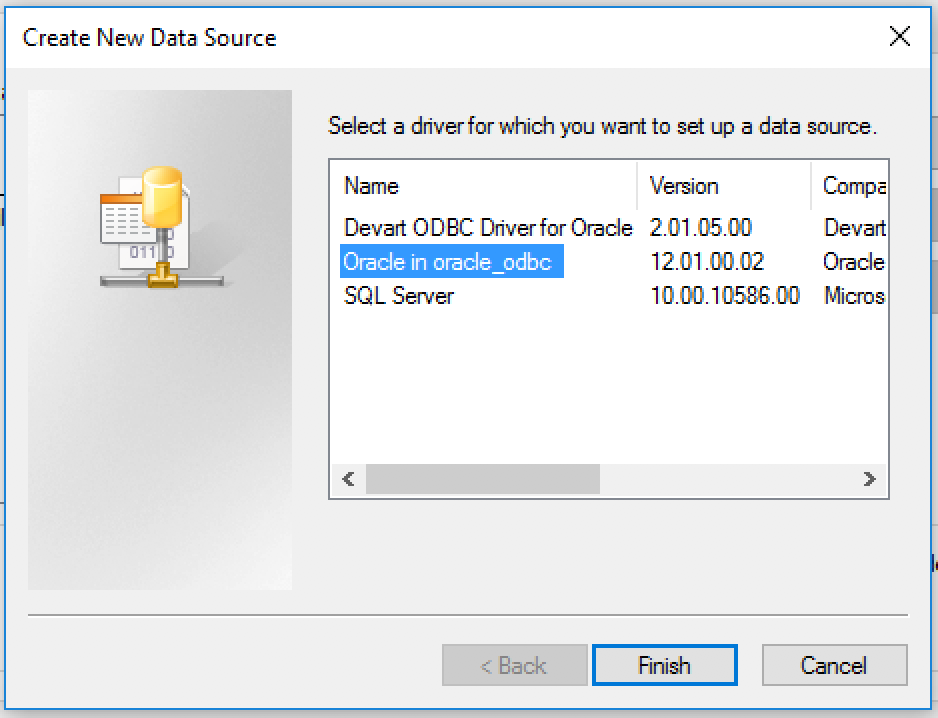
Pick your Oracle driver, and click Finish.
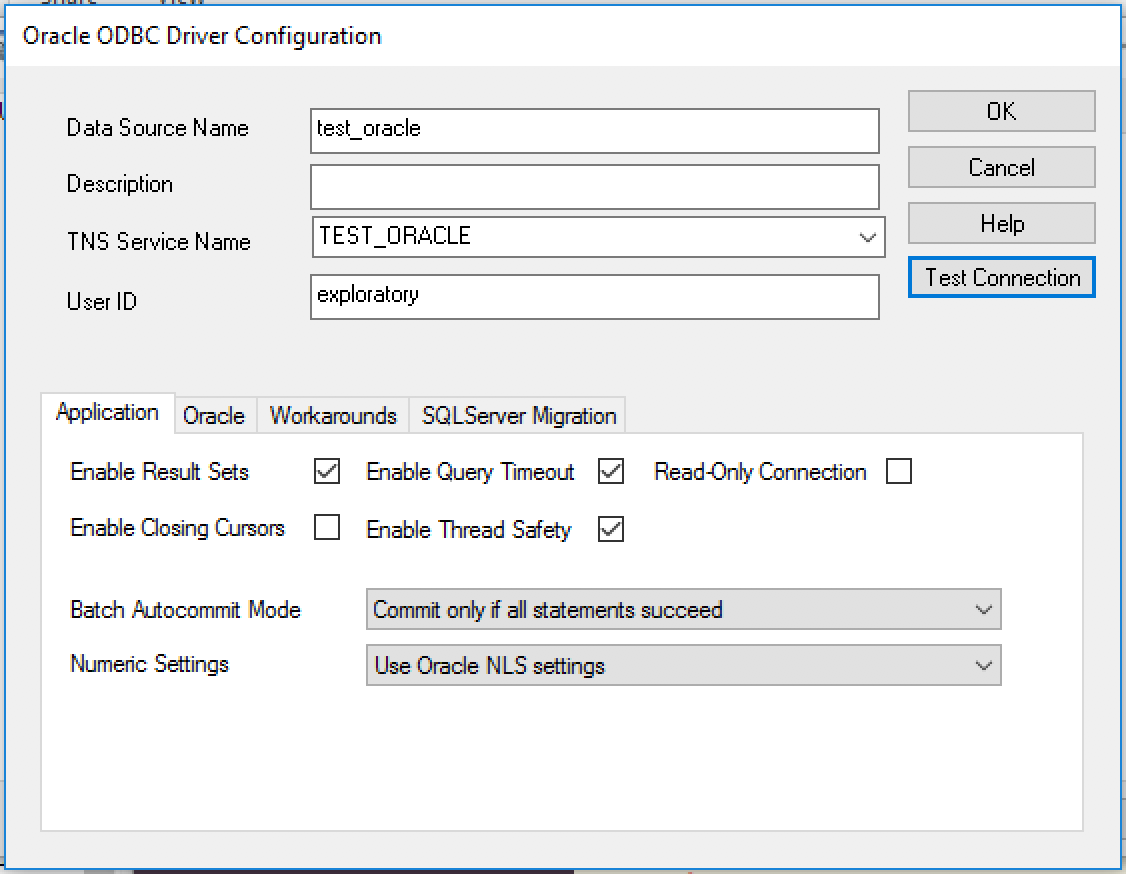
Fill the form like above. Data Source Name (DSN) is the name you will need to point from Exploratory later to connect to this databsase.
TNS Service Name is the name you specified in the tnsnames.ora file you created.
User ID is your database user ID.
At this point, you can test this connection by clicking the Test Connection button.
When it’s successful, click OK to save the new DSN.
Then set this DSN to Exploratory, so that Exploratory can connect to this database, by following the instruction below.
https://docs.exploratory.io/import/odbc.html